In this guide, you’ll learn how to automate a feedback collection process using Attio, Forms.Fillout.com, and Make.com. Here’s what the workflow will do:
- A lead is moved to a specific view in Attio.
- An email with a link to a feedback form is sent automatically.
- When the form is filled, the lead is moved to another view in Attio.
- A thank-you email is sent to the lead.
- A notification is sent to a Slack channel to keep the team updated.
This end-to-end process will save you time, keep your feedback organized, and ensure that your team is always in the loop.
📋 What You’ll Need
- Make.com account
- Attio account (for managing leads)
- Fillout.com account (for collecting feedback)
- Email service (Gmail, Outlook, or SMTP setup)
- Slack account (for team notifications)
- 30-45 minutes of setup time
🎯 Goal
We aim to streamline feedback requests through automation, reducing manual work and ensuring a smooth experience for both you and your leads.
Step 1: Set Up the Feedback Form with Forms.Fillout.com
1. Go to fillout.com, Register, and Create a New Form
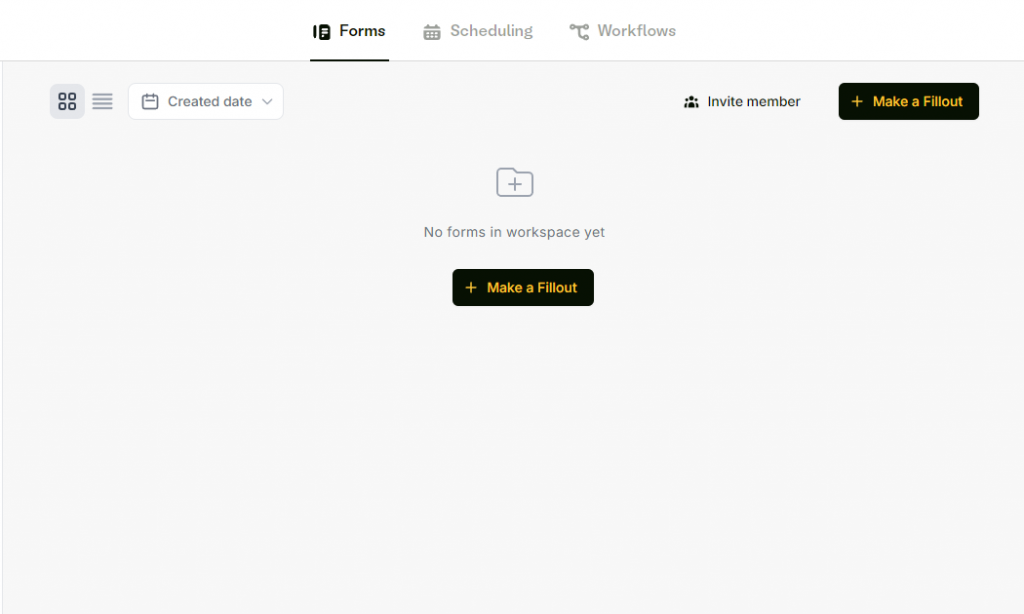
2. Choose a Template
Fillout offers a variety of templates—select one that suits your feedback needs.
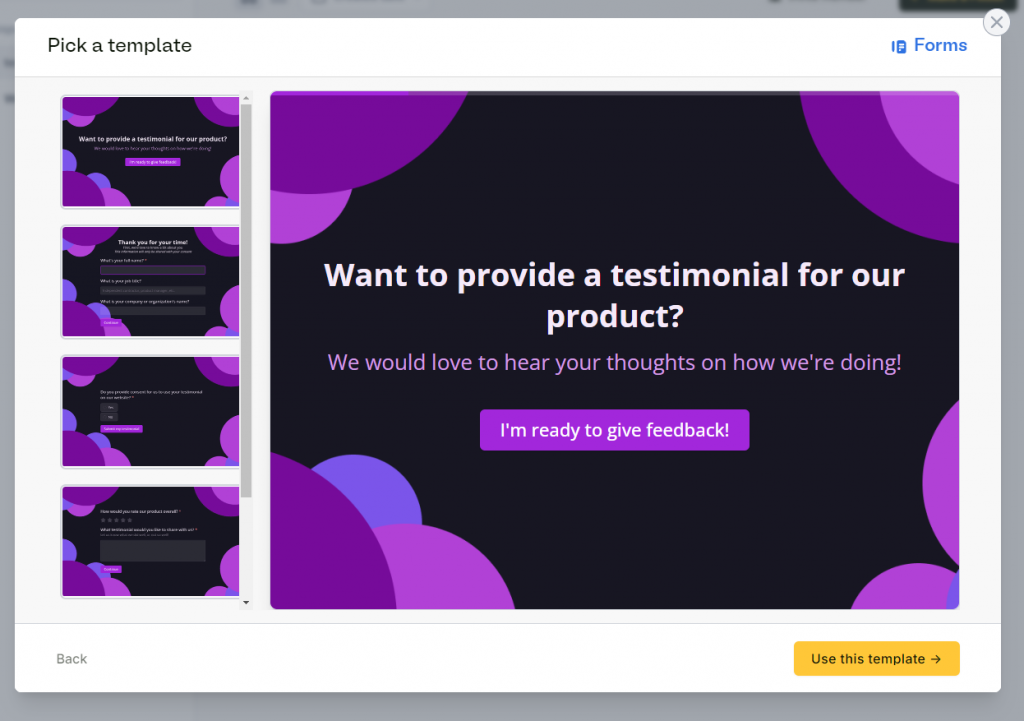
3. Customize and Publish the Form
- Remove any irrelevant pages.
- Ensure there are fields for the user’s email and name.
- Add a feedback text field and a rating scale if needed.
- Include a thank-you page at the end.
- Go to Settings -> URL parameters and add these parameters:
- firstName
- lastName
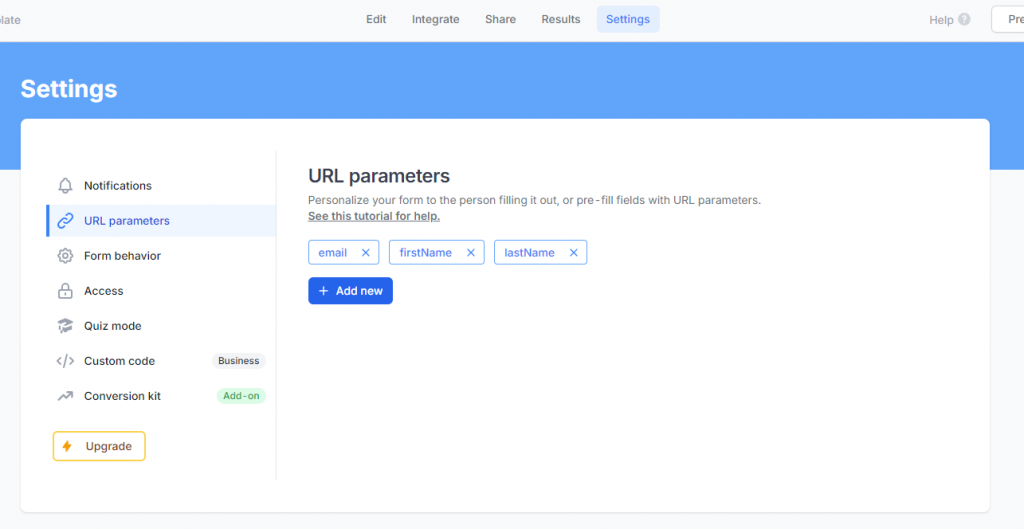
Enable field pre-filling: Go to each field’s settings and set the default value to be filled by these URL parameters.
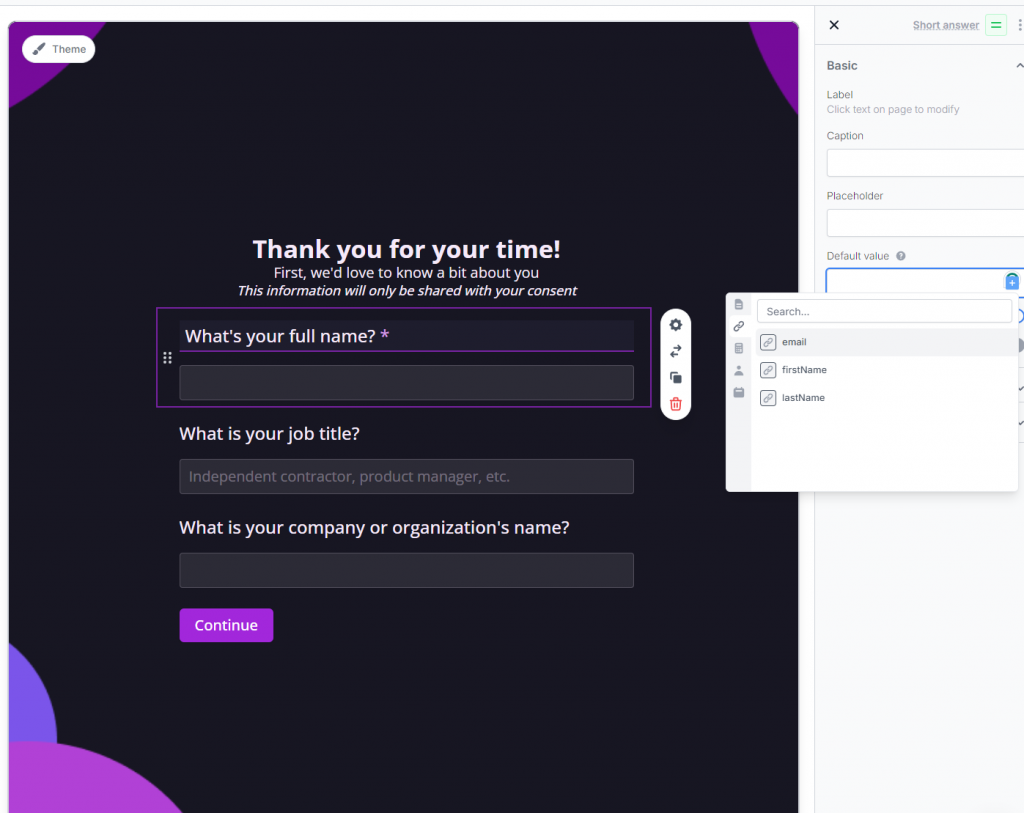
- Click Save and Publish to get a shareable link.

4. Copy the Form Link
Save the form link as you’ll use it in the email setup later.

Step 2: Setup Attio
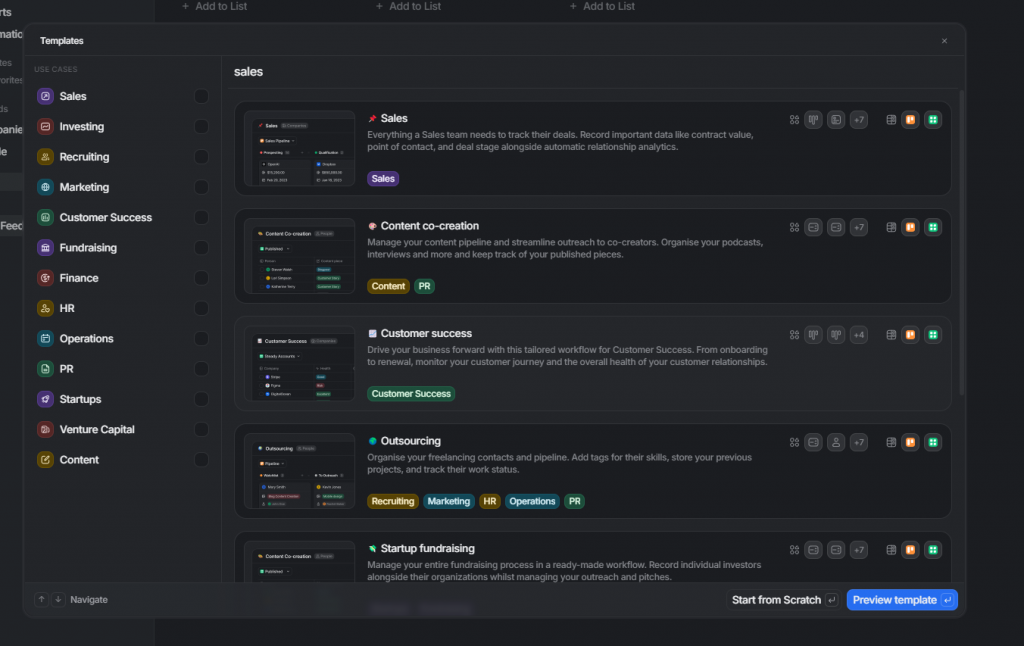
1. Create a New List in Attio
- Go to Attio and click Create New List.
- Name it something like Lead Feedback Management.
- Use “Sales” template as a starting point.
- Change “Parent Object” to people.
2. Set Up Stages in Attio
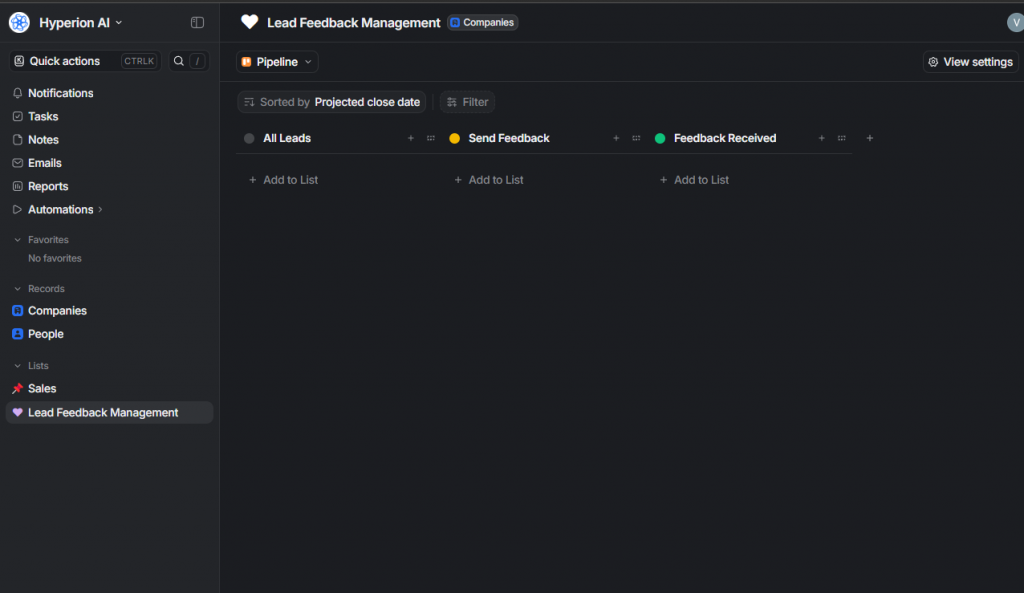
- Create stages such as:
- All Leads (to store all incoming leads)
- Send Feedback (where you move contacts to trigger the automation)
- Feedback Received (where contacts move after feedback is submitted)
Step 3: Set Up Feedback Email Sending Workflow
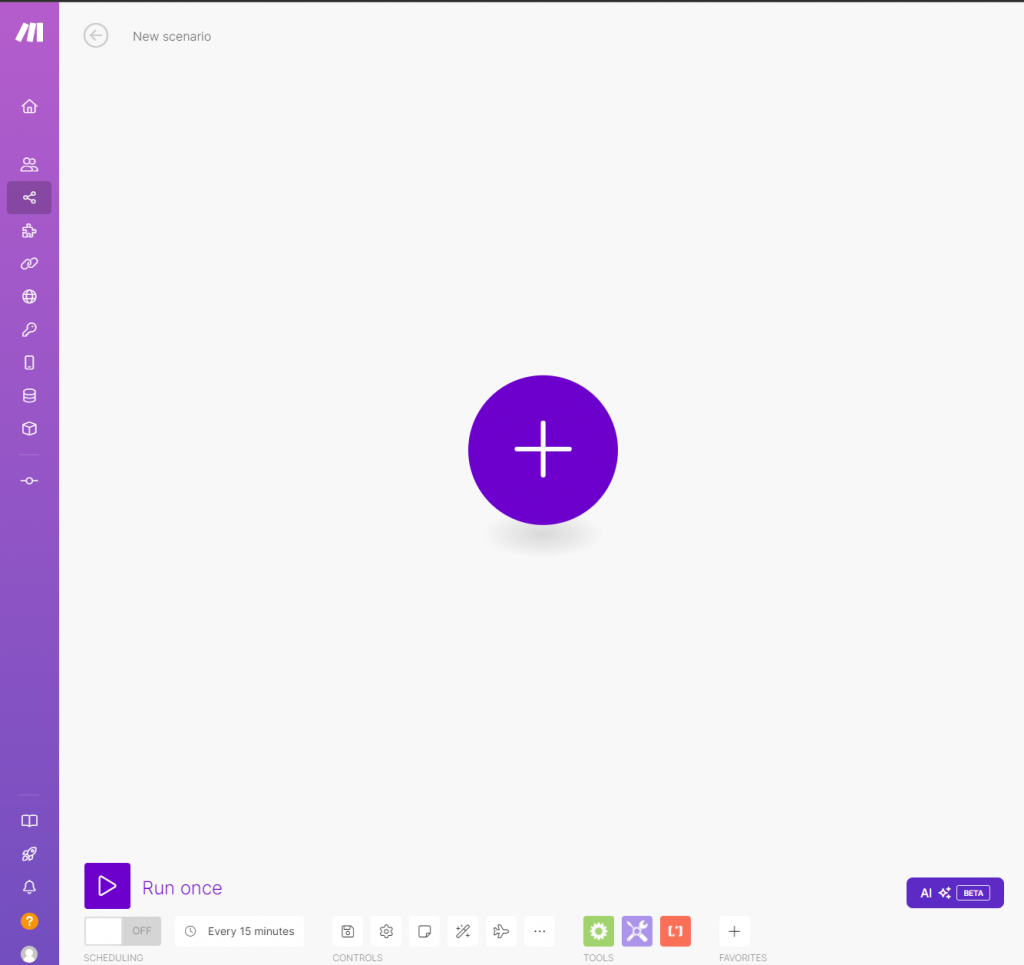
1. Create a New Scenario in Make.com
Log in to Make.com and click Create a New Scenario.
2. Add a Webhook Module to Watch for Moved Contacts
- Add a Webhook module.
- Select “Custom Webhook” and click Add to create a new webhook.
- Copy the generated Webhook URL—you’ll need this to send data from Attio.
3. Add Automation Workflow to Attio
In Attio click “Automations” -> “Workflows” -> “New Workflow”
Select List entry updated as a trigger, and choose the “Lead Feedback Management” list with “stage” as the attribute.

Add a filter module to trigger only when the stage changes to “Send Feedback.”

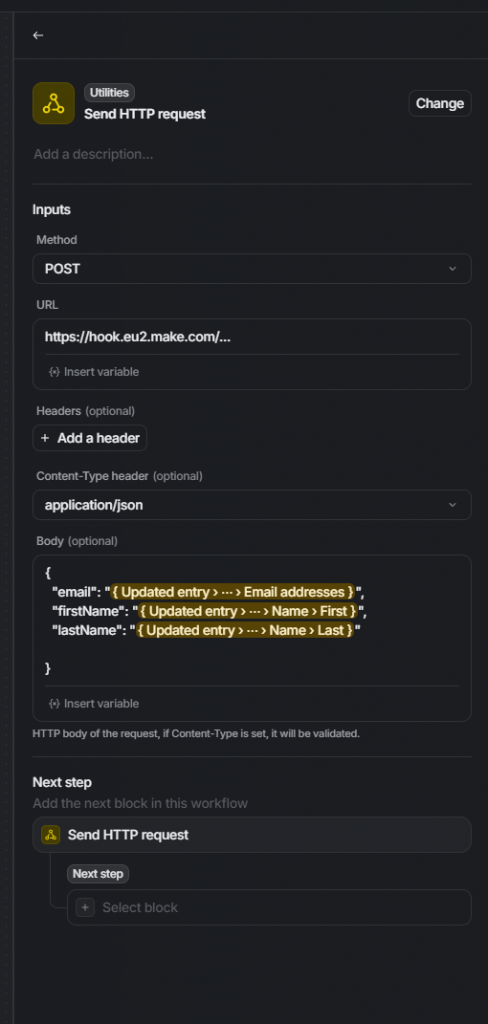
Add a Send HTTP Request module:
Paste the Make.com webhook URL and include fields like email, first name, and last name in the request body.
Publish the workflow.
4. Test out the workflow
We need to run the flow to test if the integration works and to map the passed user fields in make.com.
- In make.com click “Run Once”
- In Attio go to the lead feedback management list, create a record, add an email, first name, and last name.
- Move that record from first stage to “Send Feedback” stage.
After a couple of seconds make should show the response that it got from Attio

5. Add an Email Module to Send Feedback Form Link
- Click the + icon to add another module and choose Email.
- Select “Send an Email”.
- Connect your email service (e.g., Gmail, Outlook, or custom SMTP).
- Set up the email fields:
- To: Use the lead’s email (map this from the Attio contact data).
- Subject: “We’d Love Your Feedback!”
- Body: Include a personalized message and the form link:
Hi {{Lead Name}},Thank you for your interest in our services!We would appreciate it if you could take a moment to fill out this feedback form: [Insert Form Link]?email=[userEmail]&firstName=[userFirstName]&lastName=[userLastName]Your feedback helps us improve!Best regards,[Your Name]
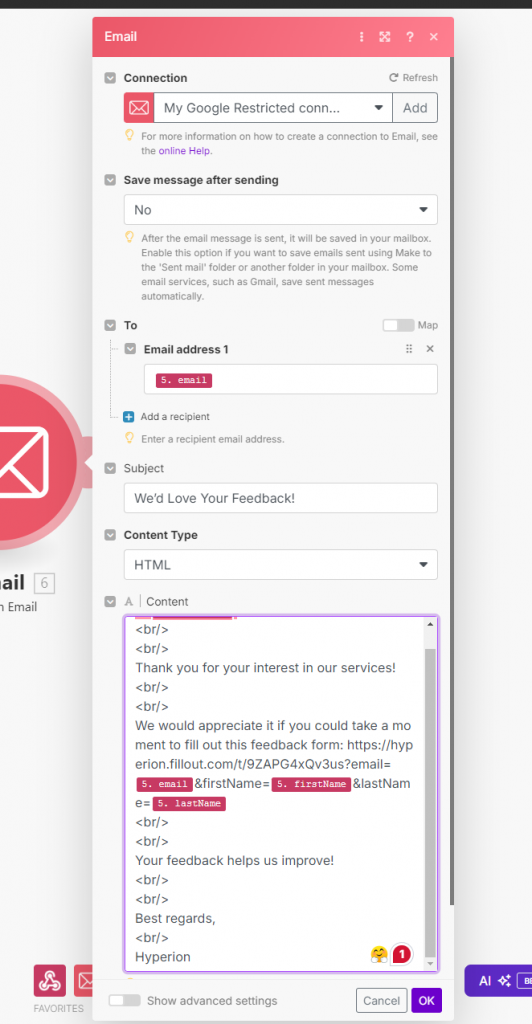
Notice how we are pre-filling user information fields in form link so they would be populated from Attio.
Step 4: Set Up Feedback Retrieval Workflow
1. Set up a new make.com scenario
- Go to make.com and click Create a New Scenario.
- Add a webhook module and create a new webhook, name it “feedback-form-received”
- Copy the URL
2. Set up a Fillout automation
- Go to fillout.com and click “Workflows” in the navbar.
- Create a new blank workflow and apply it to your feedback form.
- Select “Form Submitted” as a trigger and “Send Webhook” as an action.
- Paste make.com webhook URL in the action.
- Click advanced view and add email and name body parameters.

- Publish the workflow.

3. Test out integration
Again test out the integration in a same way we did with the first make.com scenario.
4. Add a new Attio workflow
We need to create a new Attio workflow which will update Feedback Lead list.
- Create a new workflow.
- Add a “Webhook received” trigger.
- Add a “Parse JSON” action.
- Make it parse email and name fields from webhook request.
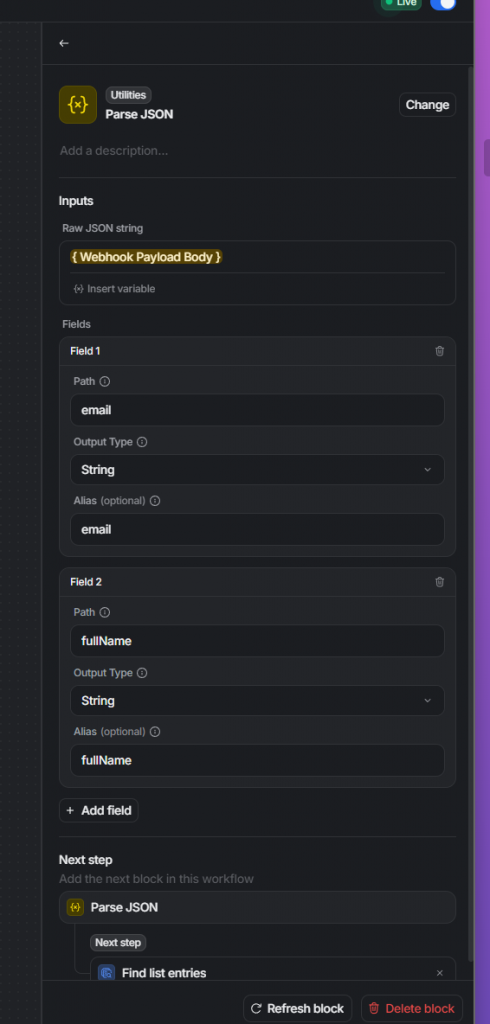
- Add “Find list entries” action to find entry from out list.
- Filter entries from list by parsed email.

- Add an “Update list entry” action to update the entry.

Whole flow looks like this:

Publish the workflow.
6. Add HTTP Request module to make.com scenario
We need to call this new Attio workflow from make.com.
- Add “HTTP Request” module in make.com scenarion
- Make it send request to Attio webhook
- Pass email and name as request body fields

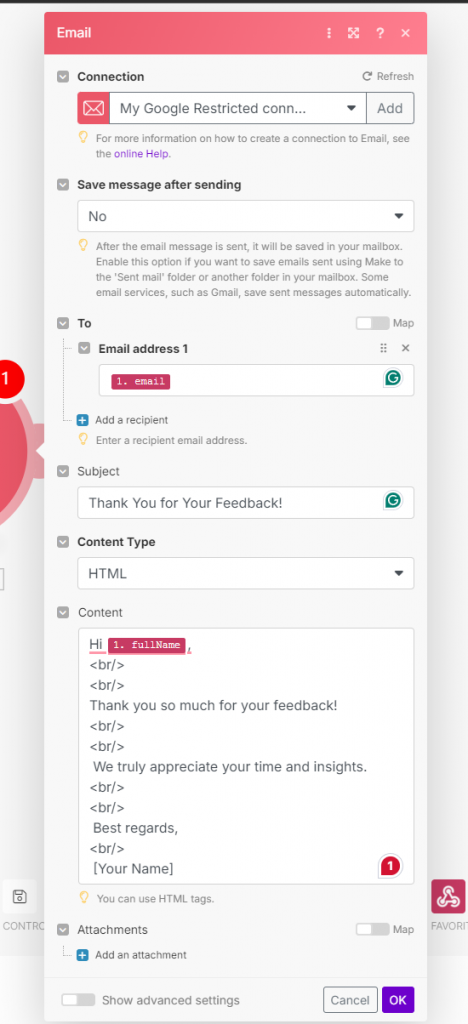
7. Add an Email Module for the Thank-You Email
- Add another Email module to send a thank-you note after the form is filled.
- Set up the email fields:
- To: The lead’s email.
- Subject: “Thank You for Your Feedback!”
- Body: Include a personalized message:
Hi {{Lead Name}},Thank you so much for your feedback!We truly appreciate your time and insights.Best regards,[Your Name]
8. Add a Slack Module to Send a Notification
- Click the + icon again and select Slack.
- Choose “Create a Message”.
- Connect your Slack account and select the channel (e.g., #feedback).
- Customize the message:
🎉 New Feedback Received! Lead: {{Lead Name}} Check out their feedback in the *Feedback Received* view in Attio!

9. Test the Entire Scenario
- Click Run Once to test the entire flow.
- Submit feedback in your form.
- Check if the workflow triggered

- Check if the contact moves to Feedback Received after form submission.

- Check if a thank-you email is sent.

- Check if a notification is sent to your Slack channel.

10. Turn on the Scenarios
- Toggle the scenarios to ON once everything is working correctly.

🎯 Why Use This Automated Feedback System?
Automating your feedback collection process ensures that no lead is missed, your follow-up is timely, and your team stays informed. It’s a simple yet powerful way to improve customer experience and make better business decisions based on feedback.
Key Benefits of Automating with Make.com:
- No More Manual Follow-Ups: Feedback requests and responses are managed seamlessly.
- Centralized Feedback Tracking: Organize feedback in Attio and keep everything in one place.
- Real-Time Updates: Receive Slack notifications as soon as feedback is submitted.
Potential improvements:
- Personalized Touch: Take your feedback emails to the next level by using LLMs like ChatGPT to craft tailored messages. These emails can reflect the lead’s previous feedback, preferences, and other personalized details, creating a more engaging experience.
- Improved Lead Capture: Sometimes, you might receive feedback from individuals who aren’t yet in your CRM. To ensure you don’t miss out on these new leads, you can adjust your Attio workflow to automatically create a new record when feedback comes from an email that isn’t in your database.
- Streamlined Approach: In this guide, we rely on Make.com for most of the automation. However, both Forms.Fillout.com and Attio offer built-in integrations, too. While these might work for basic needs, they often come with limitations, and the free tiers may not cover the level of customization you want. For advanced automations, Make.com remains a versatile choice.
Templates
Download our Make.com templates from: https://shared.hyperionaiagency.com/
Looking to streamline your customer interactions with automation?
Reach out to us for customized automation solutions that save time and boost productivity.
Let’s build smarter processes together!

